You can read about the planning here.
You can read about the decor here.
Since then, my Dad has come for another visit and the hole for the sink was cut. The hinge for the oven was switched from the side to the bottom. The hole for the plexiglass piece for the oven was also cut and sanded. The wooden trim was added to the top to cover the weird mounting brackets.
Progress here:
All of the holes have been caulked. All of the holes that are needed (for dials and handles) are drilled. And ready for paint.
I picked a can of white semi-gloss paint and primer in one that cost $7. Laziness people. I'm not painting twice. I picked semi gloss even though I did a coat of clear on the top. The semi gloss is nice and shiny and very easy to clean. It's the kind of paint used for trim in houses (you know where fingerprints are). I picked a tester can for the color for the "countertops" and then to paint the trim at the top for $2.95. I already had brushes and the clear finish from other projects.
It's a little yellow-y because the garage light is kind of orange.
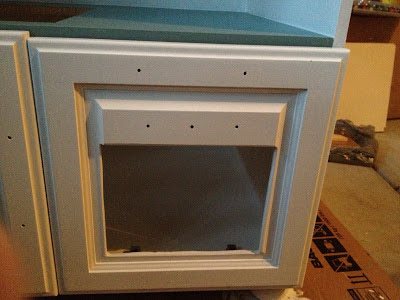
Here is an up close of the oven door (that got the most work) with the caulked holes painted over, the pre-drilled holes for hardware and oven dials, and the window cut for plexiglass.
And here she is from a different angle. We are planning to put together all of the details seeing as Christmas is tomorrow.


No comments:
Post a Comment
Thanks for reading!